The Main PCB does not detect that any (or not enough) water has flowed into the tub based off the pressure sensor frequency.
Cause
Water supply faucets are not fully open, or low water pressure.
Water inlet hoses are kinked, pinched, or crushed.
Solution
Make sure that the water faucets are fully open.
Make sure that the hoses are not kinked, pinched or crushed behind or under the washer.
Be careful when moving the washer during cleaning or maintenance.
Cause
Water inlet filters are clogged.
Solution
Clean the inlet filters.
Cause
The end of the drain hose is lower than 29.5 inches above the bottom of the washer.
Solution
Move the end of the drain hose so that it is higher than 29.5 inches above the bottom of the washe
DETAILS BELOW:
FIRST ACTIVATE TEST MODE TO CHECK IF WATER IS OR IS NOT COMING INTO THE TUB.
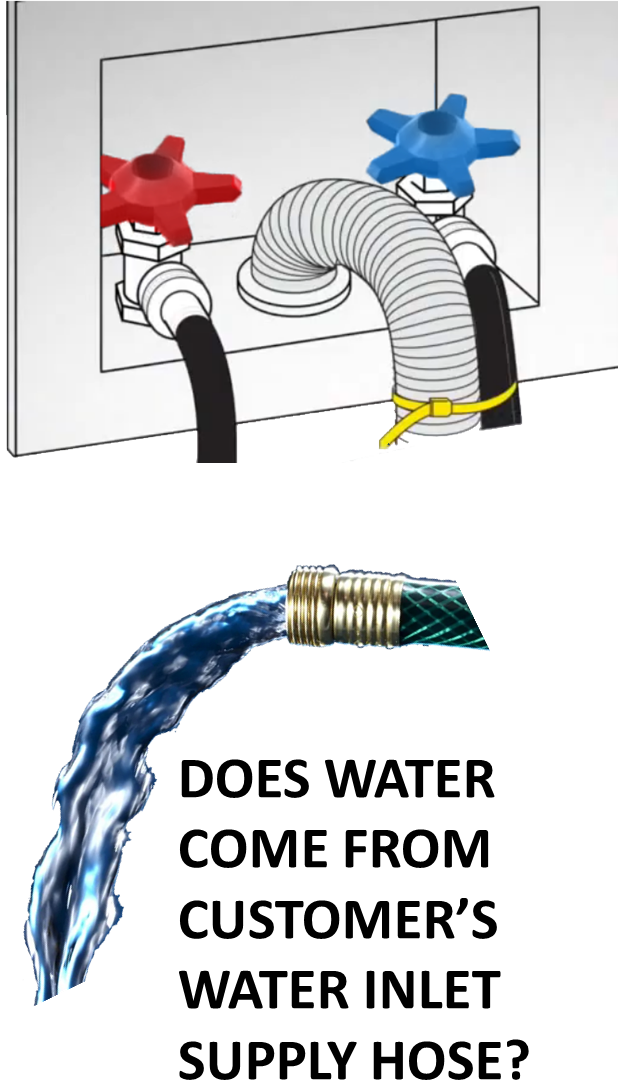
If it is not then check the customer’s water supply valves for turned on and completely open?
Water Supply Faucets
Both the hot and cold water valves must be turned on for proper operation. Turn both the hot and cold water valves off, and then back on again so that they are fully open. Be sure that water does come out of the customer’s water supply valve and hoses.
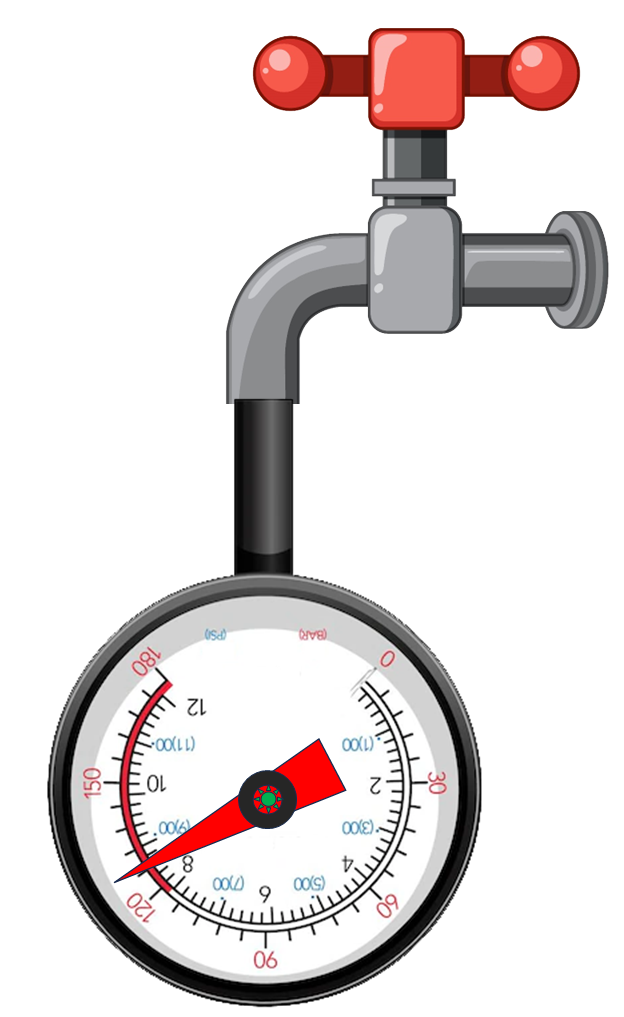
Water Pressure
This would also be a good time to test the water pressure supplied to the unit.
Your washer must be supplied with the proper water pressure or it will fill slowly. The requirement for the water pressure for LG washers is 20 to 120 PSI. If there is an external water filter, this will decrease the water pressure as it exits out of the filter. Low water pressure may also result in the dispenser not functioning properly, leading to detergents or additives not being completely rinsed from their respective compartments.
Are the water valve inlet filter screens blocked or clogged with minerals? Now would be a good time to verify this issue.
CLEAN THE INLET FILTERS
CAUTION
Do not use the washer without the inlet filters.
Doing so it will cause leaks and malfunction.
If you use the washer in an area with hard water, the inlet filter may clog due to lime buildup and require more frequent cleaning.
Turn off the washer, and unplug the power cord.
Turn off hot and cold water faucets.
Unscrew the hot and cold water hoses from the back of the washer.
Remove the filters from the water valves carefully.
Use pliers to pull out the filters from the water valves.
Remove foreign objects and soak the filters in white vinegar or a lime scale remover. If using a lime scale remover, follow the manufacturer’s instructions. Be careful not to damage the filters while cleaning them.
Rinse filters thoroughly and press them back into place.
Flush then reattach the water hoses. Before reattaching the water inlet hoses, flush them by running several gallons of water through them into a bucket or drain, preferably with the faucets wide open for maximum flow.
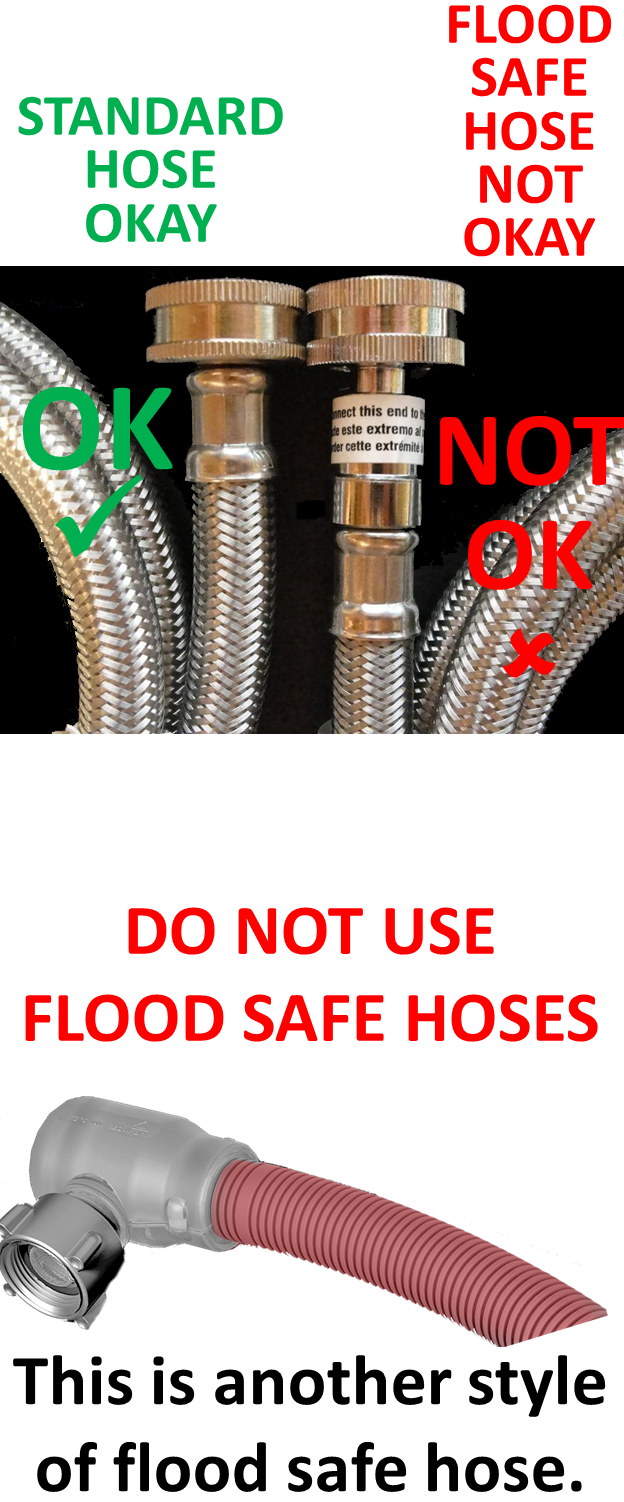
Inlet Hoses
Are flood safe hoses being used? These cannot be used due to the pulsing operation of the water valves.
Only the standard supplied hoses should be used. If the inlet hoses are kinked, this will slow down the water flowing into the unit and will cause the unit to fill slowly.
Check the inlet hoses at the back of the unit and straighten them if necessary. Also, check and make certain that the hoses are fastened securely and that they are not leaking, split, or cracked.
DO NOT USE flood-preventing hoses with auto shutoff devices. The devices can be tripped during fill and prevent the washer from filling properly.
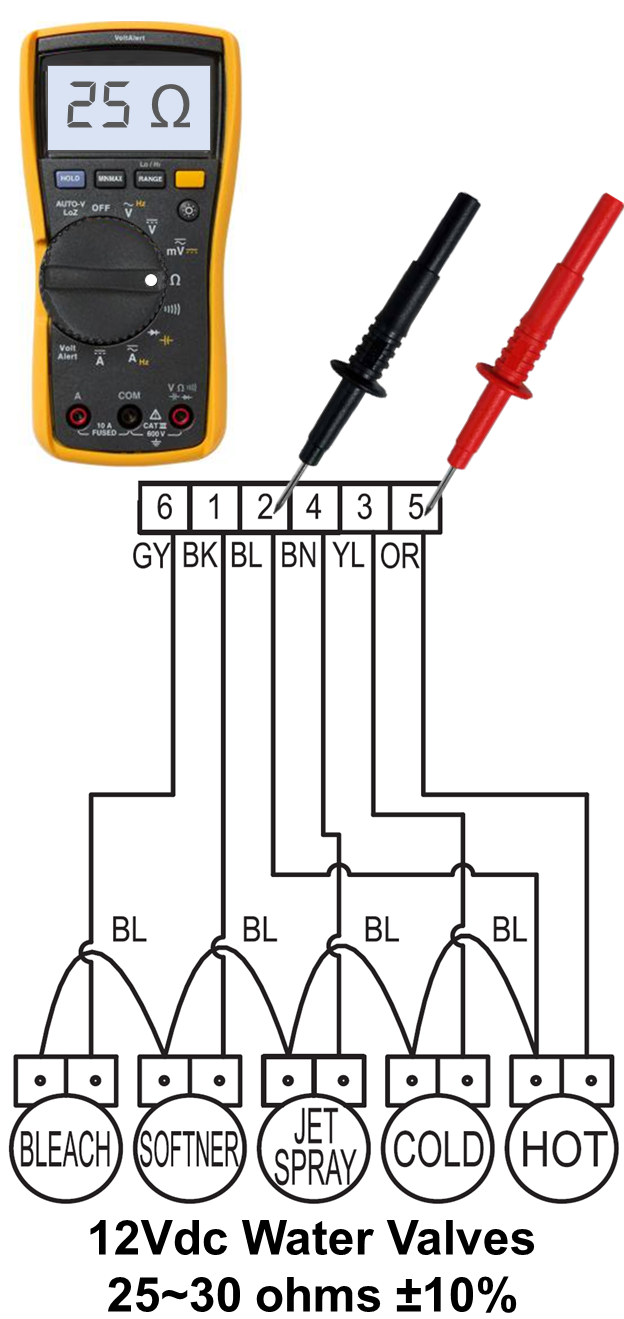
Unplug the unit. Check the harness connections at the water valves and at the Main PCB.
Disconnect the harness connections from the water valves.
Test the resistance of each valve.
Resistance should be approximately 25-30Ω ±10% for DC valves *If an open is read, replace the valve.*
Plug in the unit and activate test mode to cycle through all water valves. Voltage should read 12VDC. If no voltage is read at the valve, check voltage at the Main PCB. If no voltage is present at the Main PCB, replace the Main PCB.
If the valves are working in TEST MODE, does the water level frequency decrease as water comes into the tub? In TEST MODE
the pressure sensor reading should start at a high number and decrease as the water comes in during the TEST MODE.
WATER FREQUENCY
When the Washer is in test mode, as the inlet valves are activated and the pressure switch senses the water pressure, the numbers on the Display will count down.
Example: If the Number starts at 255 as the drum begins to fill the number will start counting down, 254…253…etc, until the full level is achieved. *Note: The starting value will be different depending on model#.
This number dropping verifies that your pressure sensor is sensing the water level in the tub.
Use test mode to check water level frequency. Is the water level frequency over 21.3kHz? If no: does water flow continuously into tub with unit unplugged? If so, defective inlet valve.
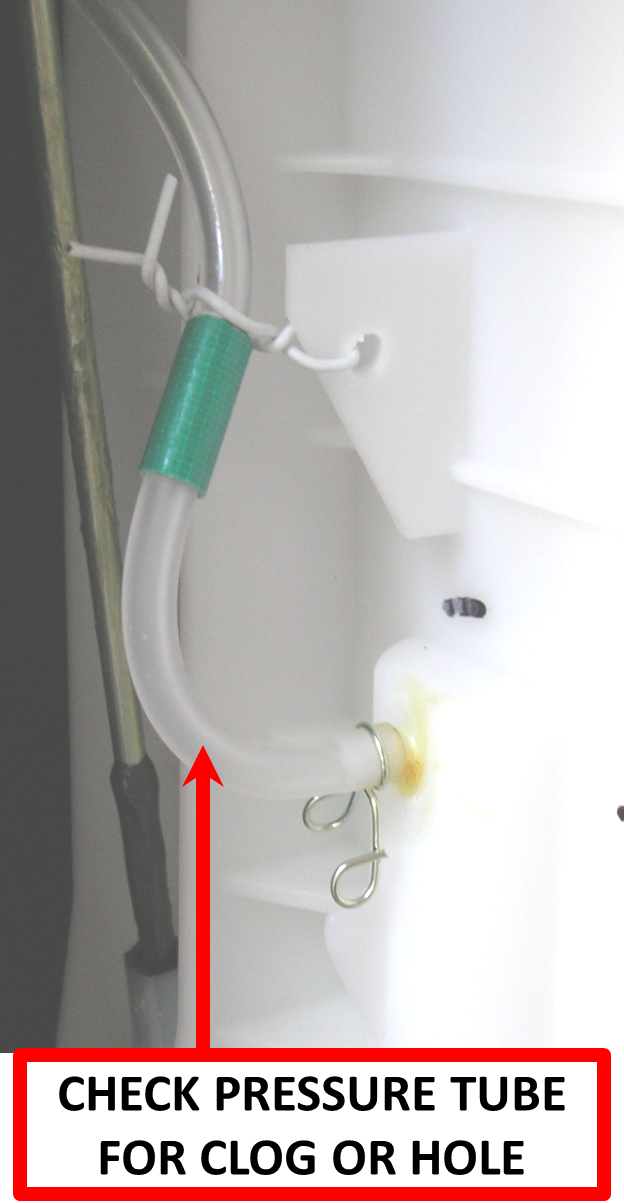
If water is coming in during water test mode and the numbers do not change on the pressure sensor readout then inspect for blockages and leaks in air hose between tub and pressure switch. Replace the pressure hose if needed. Check for lint accumulation in air chamber. The accumulation air chanber is part of the outer tub and connects to the pressure sensor hose. Clean out the air chamber if needed. It could have built up soap and lint causing no air pressure to go to the pressure sensor when water comes into the tub. See the below picture of the pressure sensor hose.
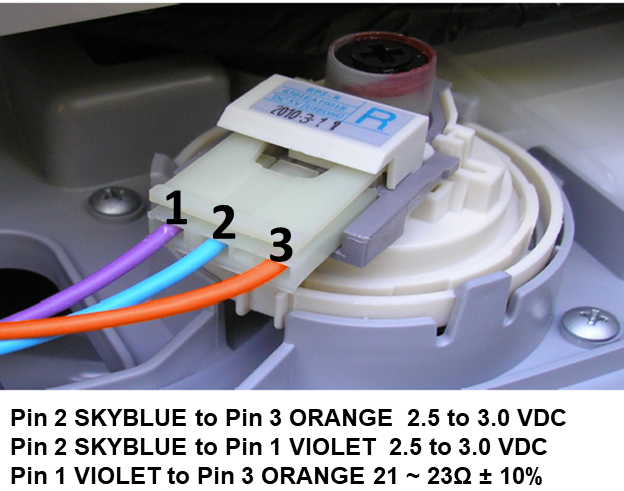
Check pressure switch for resistance of approximately 21Ω on Pin1 to Pin3.


2 Responses
Need information on how to enter test mode
Use the Test Mode Website. Go to lgrepair.com and select Test Modes towards the top of the screen. Thanks.