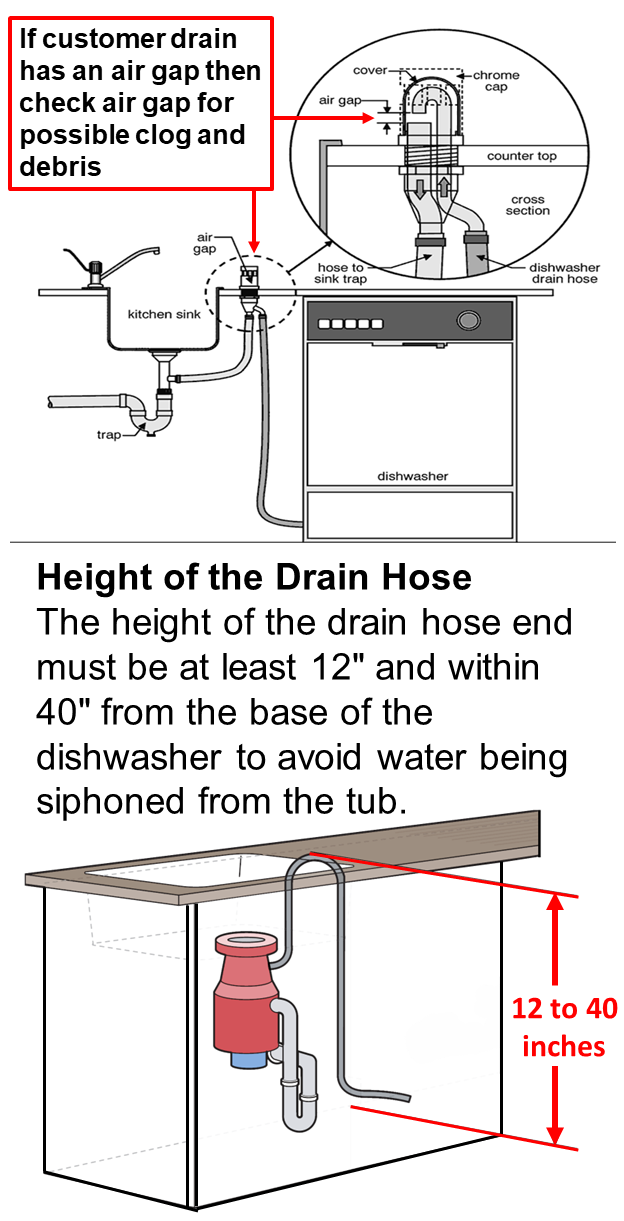
1.) Is the drain hose installed correctly? Follow the installation instructions in the owners manual.
2.) Is the drain hose kinked or blocked with debris?
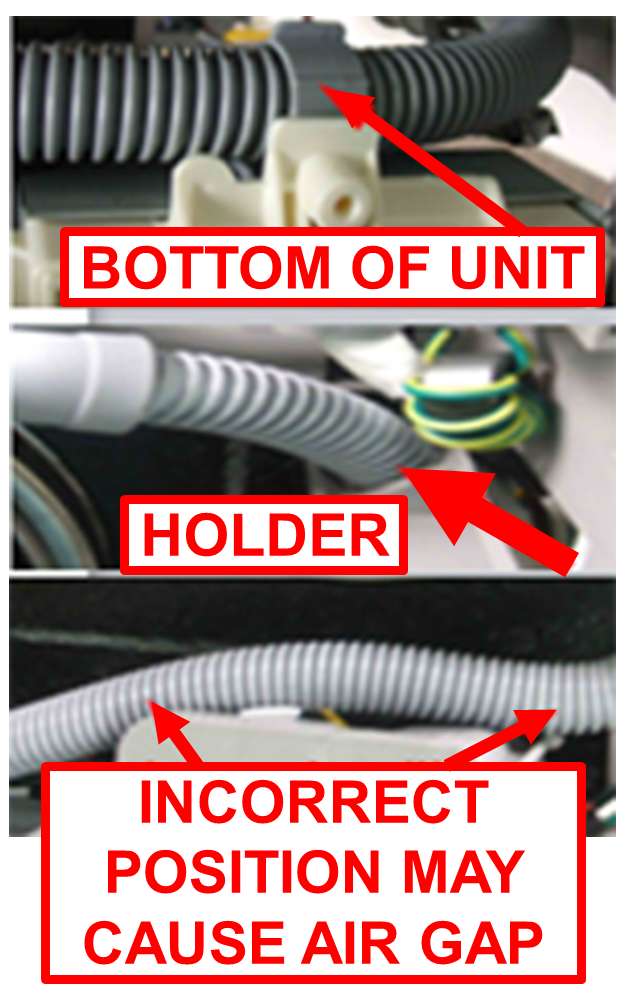
Was the drain hose routed correctly through the holders underneath the unit? Incorrect positioning of the drain hose may cause an air gap.
3.) If the drain hose is connected to a garbage disposal, was the knock out plug removed where the dishwasher drain connects to the disposal?
4.) Is the drain line connected to an air gap at the sink? Remove the cap at the sink to check for debris.
5.) If the unit has a float box assembly, check to see if there is a lot of debris or mineral build up causing the float switches to stick.
Recommendation: if above situation is found, replace float box.
6.) Is the drain pump impeller broken or stripped? Any obstructions in the sump or check valve? The drain pump may need to be replaced.
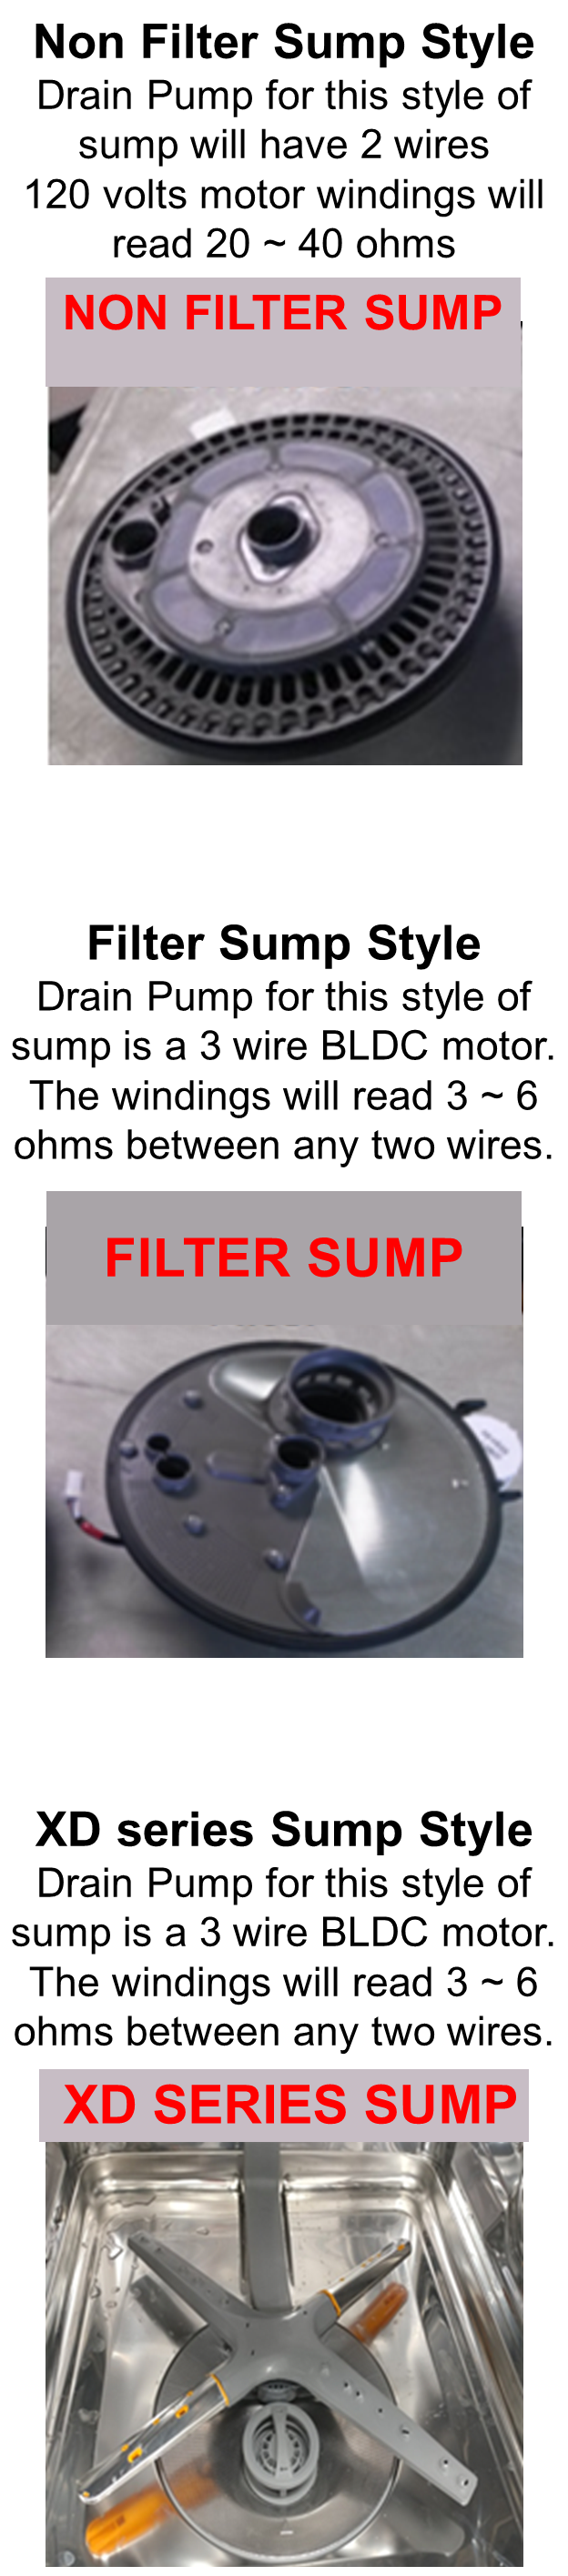
7-1) Troubleshooting information that follows will be related to specific sump styles.
Use the information appropriate to the drain pump installed in the machine.
Photos reference the three styles of sump assemblies.
7 -2) Measure the voltage and the resistance of the drain pump motor from the Main board.
During test mode if no voltage is being produced by the Main board, replace it.
If voltage is present, measure voltage at the drain pump.
If voltage is present, at the drain pump motor and it does not run then replace the drain pump assembly.
If voltage is not present at the pump, suspect a bad wiring harness.
Check resistance values of the drain pump motor from the Main board.
If an open is read, check again at the drain pump motor.
If the drain pump motor reads open then replace it.
If the drain pump motor winding values are good then check the wires for continuity from the Main board to the drain pump motor connector.
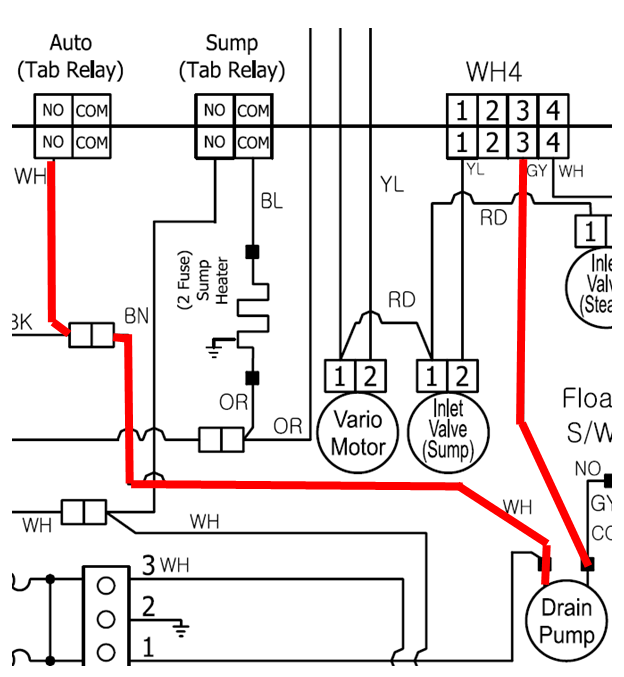
Example of 2 wire drain pump on wiring diagram. Note: circuit is traced in red for identification. Please see your wiring diagram for exact colors off the unit you are working on.This is a 120 Volt AC pump. The resistance values for this motor should be 20 ~ 40 ohms.
See example of 3 wire BLDC (brushless dc) Drain Pump motor on the wiring diagram below.
Note: The unit you are working on may have different wire colors please see your wiring diagram for exact colors of the unit you are working on.
Check the resistance values of the Drain Pump motor. This should be 3 ~ 6 ohms between any two wires.
The Drain Pump motor is a 22Vdc Brushless Motor using pulse width modulation dc voltage but can not be measured using a multi-meter set to DC voltage. You will have to use a multi-meter set to AC voltage. The multi-meter needs to be a higher quality meter capable to read high frequency inverter pulses to get any meaningful voltage readings.
Youcanusethetestmodetoactivate the Drain Pumpmotorandtestthevoltage.Thevoltageyoushouldreadisaround11-12Vacandthespeed readoutshouldbearound320 RPM.
Note: The unit you are working on may have different wire colors please see your wiring diagram for exact colors of the unit you are working on.
4 Responses
The only thing that’s missing is what voltage are we supposed to be measuring at the motor and control board other than that everything’s awesome thank you
The voltages are listed beside the pictures of the 3 different styles of sump assemblies. I sent an email with the pictures from the article.
We plan to update some of these articles like this that we first made and make it bigger and easier to read and we will also put the voltages beside the example wiring diagram pictures also for easier understanding.
Thanks for your feed back we appreciate it very much.
Very good
Excellent